Access requirements: Administrator on the till, Administrator in the retail login
NOTE: This only applies if you have a custom exe provided for your company and will not work with a standard MSI.
- Double click the exe or run it from the command line, it can be run from an external USB or drive.
- Agree to the terms and conditions then click 'Install'
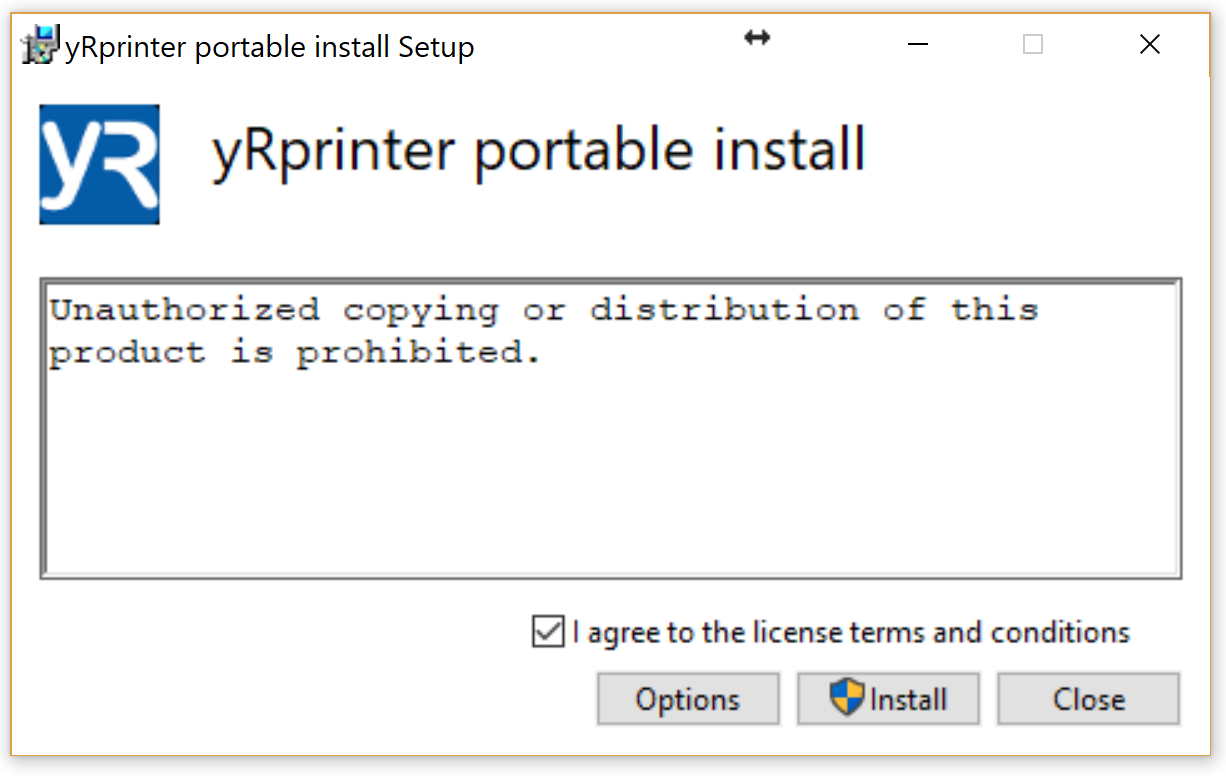
- The program will install itself, and may ask you for User Account Control Authentication depending on your Windows Version, click yes in this case.
- If the portable install is set up for promotion push, there will be a prompt for the Store ID and Store Name. The Store ID must consist of an initial "G", followed by two letters (notionally a country code), followed by 7 numbers.
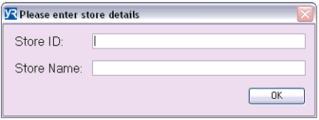
The Store Name will be used to create the store under a company and both the Store Name and Store ID will be posted with each receipt.
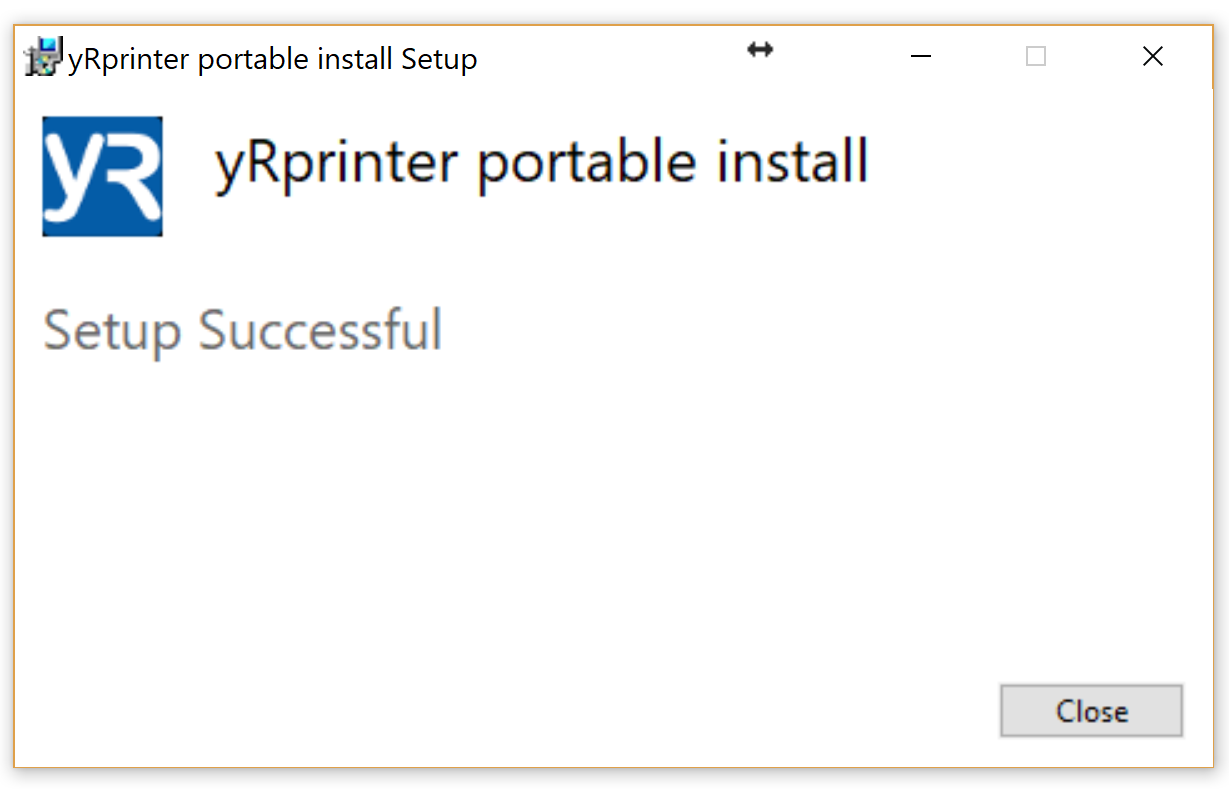
- After installation, the final window Say Setup Successful, click 'Close'
If account has a WebHook set up to assign stores to a company automatically, the process stops here. If not, it will need to be manually assigned.
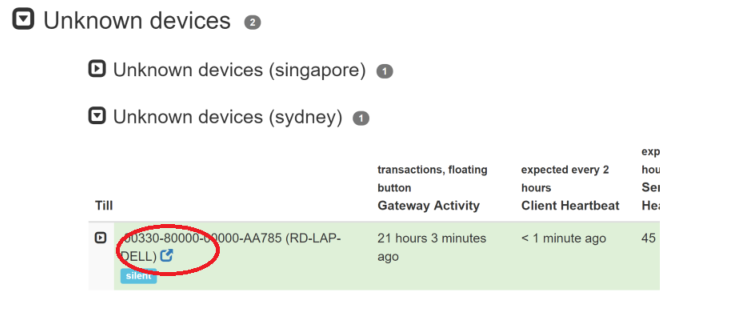
- The prism will then start up. To add it to the correct store login to the retailer site, a new store will have been added under a special company called 'Unknown Devices - Company' with an approximate location of the till as the store name. Additional tills withing that location will be added under that location.

- If the store doesn't yet exist in your store list, you'll need to add a new store with this process.
-
You can then move the till into the correct store to the correct store. First go to the the till status page
-
Expand the menu till you are on the till you want to move then open that tills page by hovering over the till and clicking the blue 'open' icon
-
Select the correct store from the drop down list.

- After that press 'Save' down the bottom of the page.
tags: GID, Emporio, GTH Store External ID