
This is required if you wish to use the prepopulation feature of the data capture screen and you do not already have an Oracle ODBC driver installed.
Ensure you are logged in as an administrator
- Download the instant client from here (Google Drive)
- Unzip and get the instant_client_11_2 directory and copy into C:\Oracle\
- Start a command prompt window as administrator (start -> cmd -> right click -> run as administrator)
- Run "cd C:\Oracle\instant_client_11_2"
- Run "odbc_install.exe"
- Close the command prompt
- Open the system environment variables settings (start -> search for system environment -> click on "edit the system environment variables")
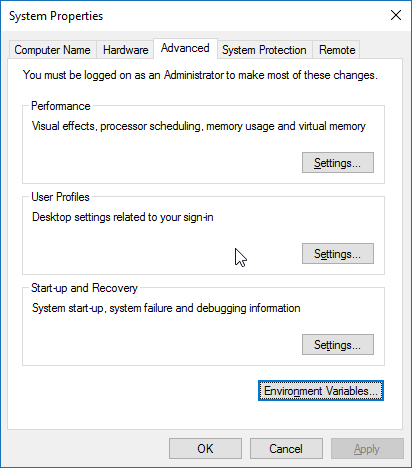
- Click Environment Variables
- Look for the "path" variable in the "system variables" section, select it and click edit
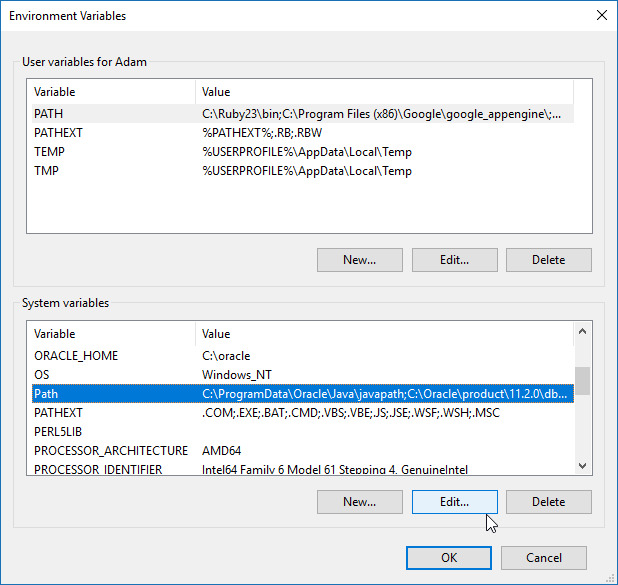
- On versions of Windows other than 10, go to the end of the string, ensure a ; is at the end. Then paste the path ("C:\Oracle\instant_client_11_2") to the instant client directory from earlier. Click OK.
On Windows 10, click the new button and paste the same path ("C:\Oracle\instant_client_11_2") in. Click OK twice.
- Search inside C:\Oracle for the tnsnames.ora file (contains the network instructions for oracle), the path is usually C:\Oracle\ODS11gr1\NETWORK\ADMIN\. If you look at the file it should contain the RPROODS descriptor
- Go back to the environment settings window from earlier. Check if a TNS_ADMIN variable exists. If not click new under the "system variables" section
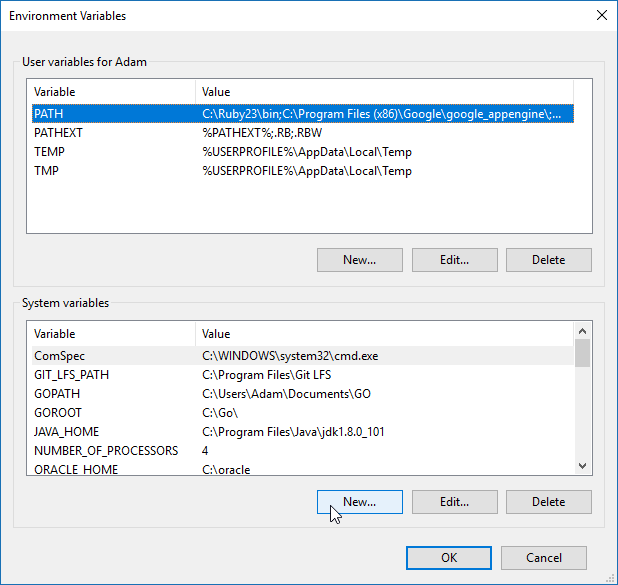
- Enter the name as TNS_ADMIN environment variable.
- Enter the value as the directory containing tnsnames.ora (Has variations depending on the existing install, do a search in C:\Oracle for tnsnames.ora)
- Click OK 3 times to close all environment variable windows
- Using the 32 bit version of odbcad32.exe (C:\Windows\Syswow64\odbcad32.exe on 64 bit versions and C:\Windows\System32\odbcad32.exe on 32 bit) create the new data source by following the below guide:
Prepopulating the Screen with Email Addresses from an Oracle Database